Raindrop Fade
If you’ve not taken a class with Kim McKenna or any of the other fabulous guides at the online School of Sweet Georgia, run, don’t walk! This project was inspired by a class Kim teaches at SOS called “Spin a Braid 5 Ways”. Kim demonstrates methods to separate, prepare, and spin a single braid of fiber to dramatically different results. So. Much. Fun.
What is a “raindrop” yarn? Raindrop yarn is fully Kim’s own terminology and idea. It describes what you get when you pull a small amount of colour from a braid of dyed fiber, about 10g for example, and mix it with about 100g of undyed fiber. I’m simplifying here. The result is a yarn with subtle raindrops of colour.
I had a project in mind, the Ravie Poncho by Inese Sang (available on Ravelry) - a project I’d happily made 3 times already - and I envisioned knitting it in a raindrop yarn with a fade of blues, pinks, and purples to move along the rectangular construction. Here are the results.


The plan, the fiber (SGY’s March secret stash colourway, “Winter’s End”), the yarn.
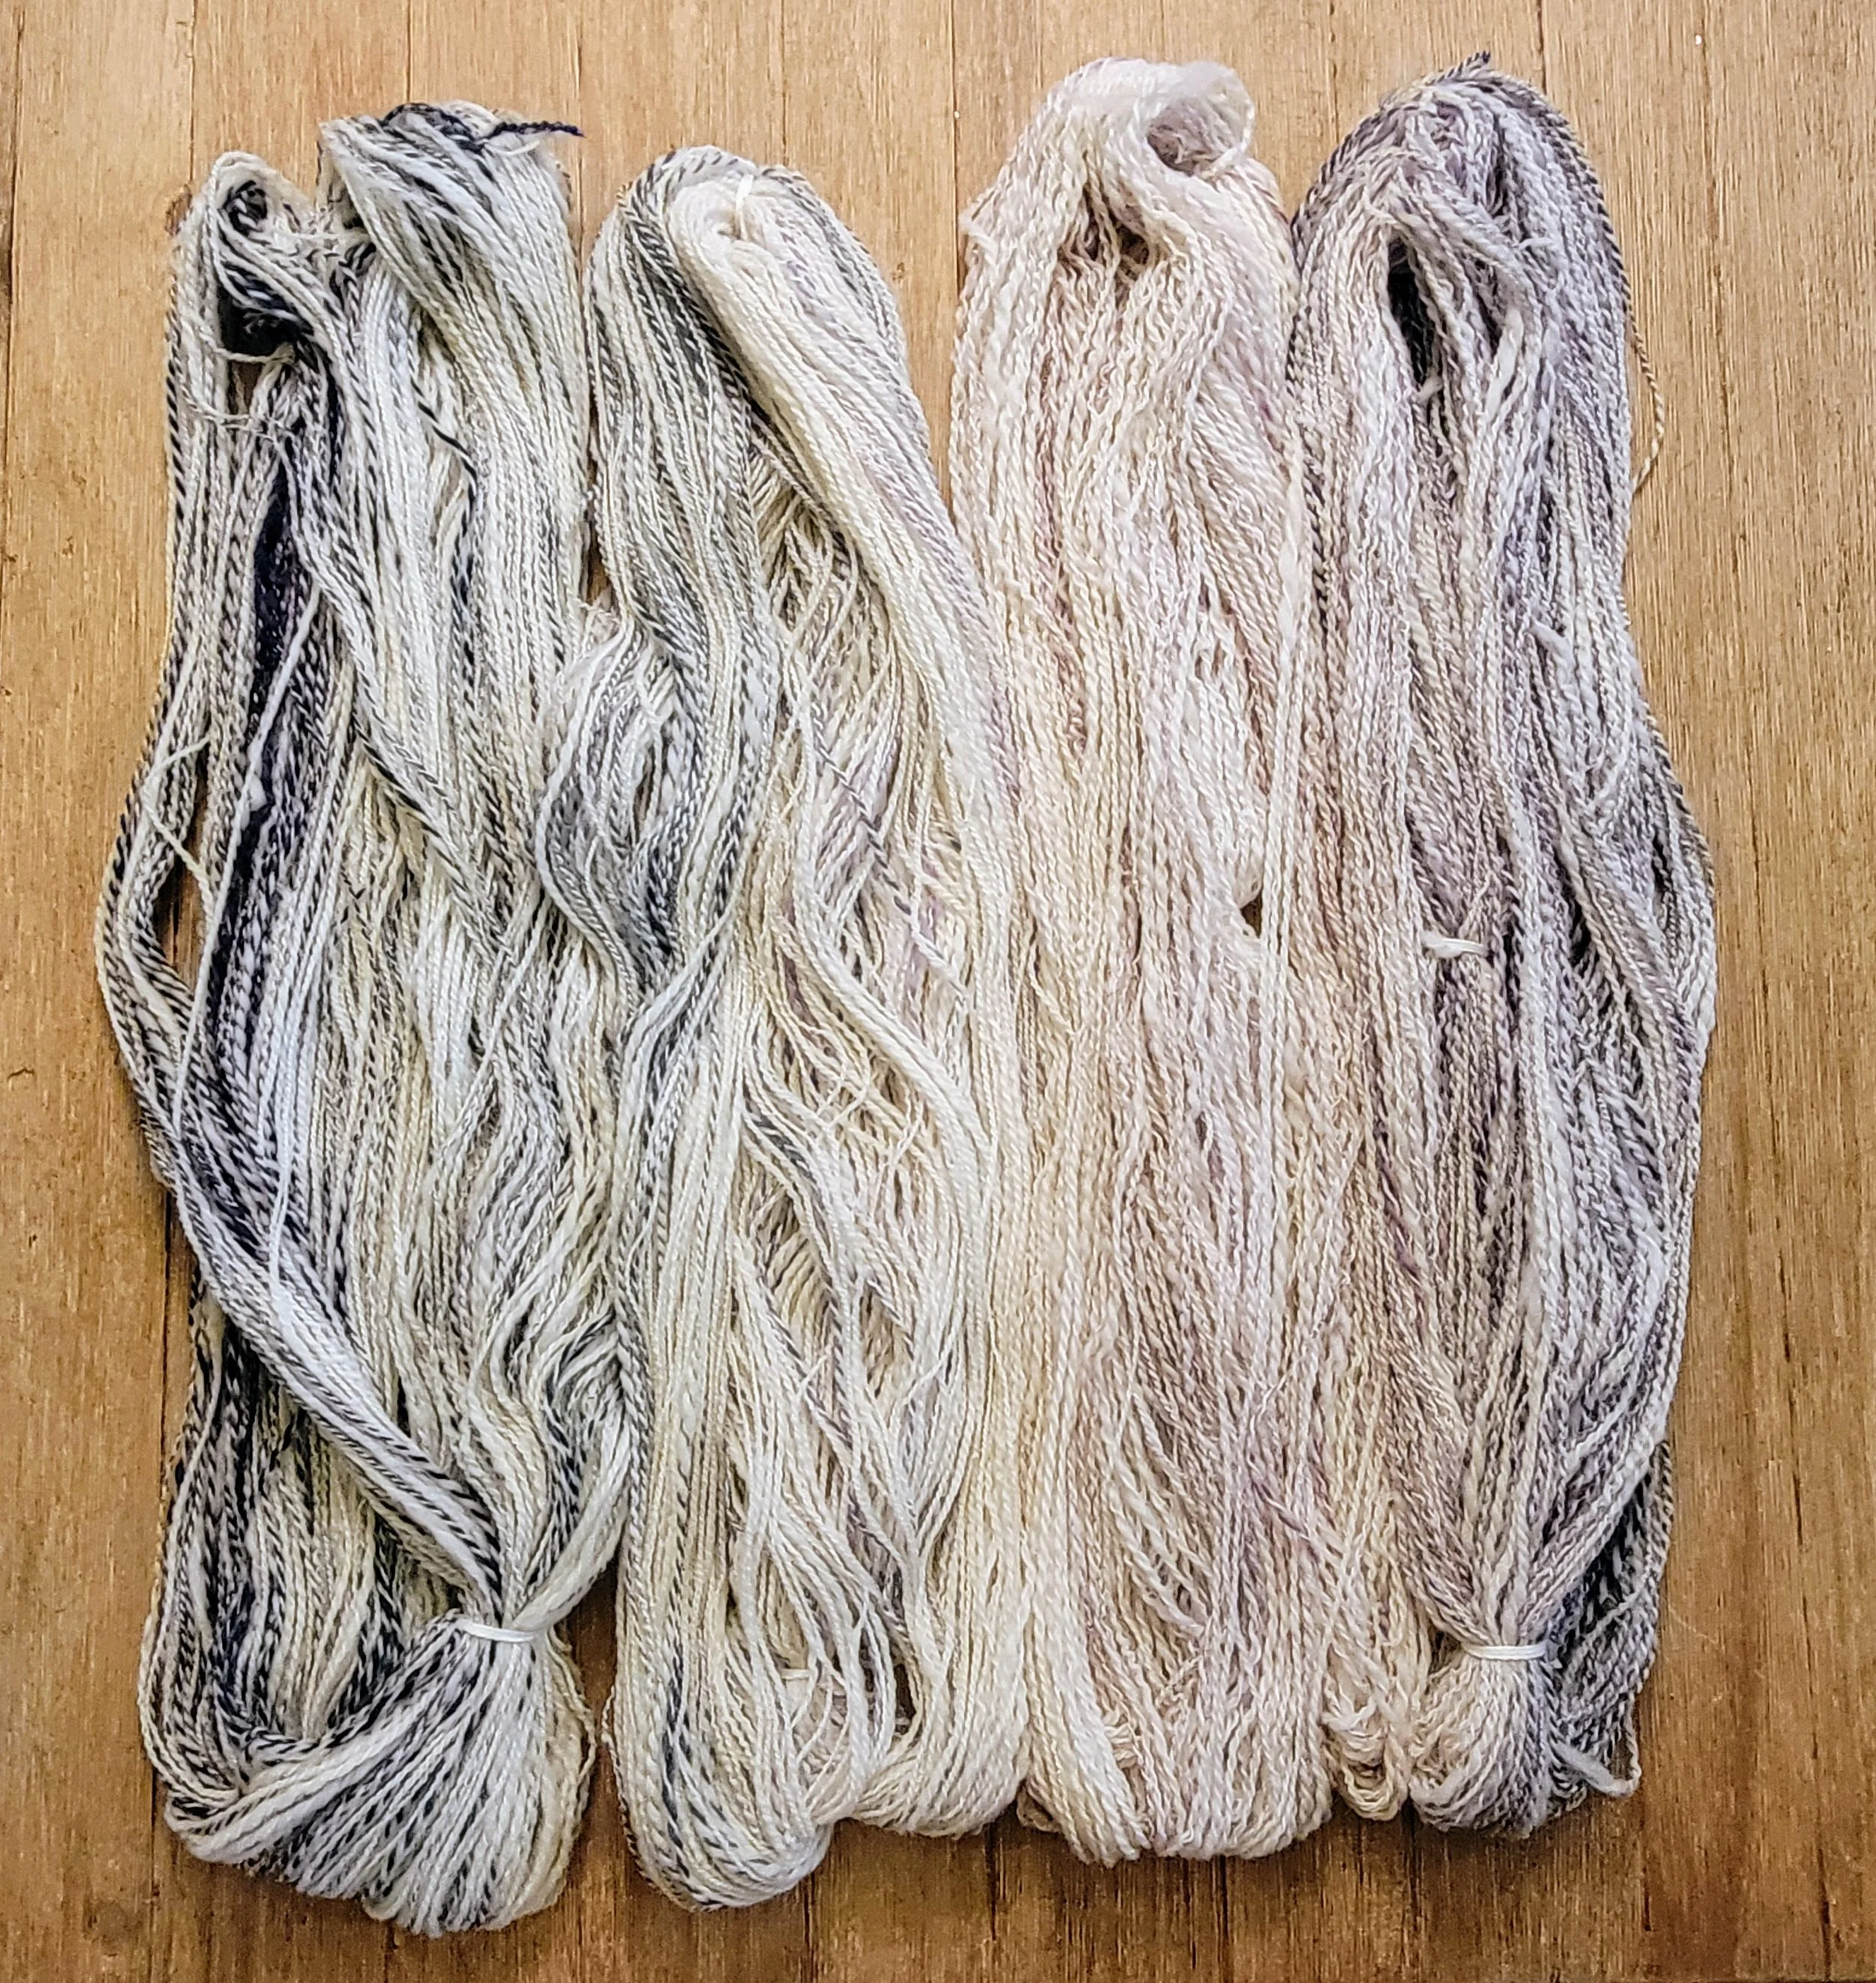
The fade is more apparent with the open skeins. The second from the right skein is the most raindrop like. All are 2-ply Polwarth and Silk.
The Process:
Step 1: Sample, always. Fiber preparation and spinning are so time-intensive, you want to be sure you like what you’re making. You can always get more fiber but you can’t get that time back. Here I pulled a tiny amount of purple fiber from my “Winter’s End” braid and dizzed it off a hand carder with about 10 times as much undyed Polwarth. I spun a quick 2-ply sample and knit up a swatch. Loved it!


Step 2: Plan and separate all the fiber you need for your project. In my case, I planned about 400 grams of fiber across 4 skeins of yarn, so this was about 50 grams of dyed fiber and the rest undyed Polwarth. Separate the colours you plan to use from your dyed braid and arrange those into a fade. Take black and white photos along the way to help get that gradient right and adjust as you go. It took me a few attempts. Once you’re happy with the results, prep the fiber. I like to diz all my fiber before spinning. It really does save time at the wheel and makes for a more consistent spin, another tip I learned from Kim McKenna.


Step 3: Combine your fibers and plan your spin. Organize your coloured fiber with your undyed fiber by placing bits side by side. You’ll need some space for this and a way to keep it organized for your spin. Be sure to leave some white space here and there. For this particular project, I wanted to spin a fade from the deep blues through the lighter blues and pinks, through the deep purples, while also having the saturation of colours change to be the lightest in the center of my yarns. To achieve this, I mixed about 15g of dyed with 50g of undyed fiber for each of the two darker skeins and 10g dyed with 50g undyed for the lighter skeins. For some of the spinning, I simply laid the coloured fiber atop the white and spun them together at the wheel. For others, I blended them together through a diz first to make them a bit more unified. I found the latter method easier to spin.


Step 4: Spin and ply. Spin your raindrop singles in the order you’ve laid out. Don’t hesitate to make adjustments at the wheel if you think you’re spinning too much colour or not enough. You can rearrange, pull some colour out, or pull an entire fluff of fiber. Prepare an equal weight of undyed fiber and spin those singles. Then ply each coloured singles with an undyed singles. This dilutes the colour that further step needed for a truly subtle raindrop effect. I plied my yarns using a Dreaming Robots EEW 6.1 spinner and a lazy kate. Wind your yarn into skeins and tie them with extra yarn in figure eights.

2 skeins plied and the rest of the coloured, dizzed fiber ready for the next colour singles.
Step 5: Wash and knit! Wash your skeins in the manner in which you intend to wash your finished garment and in a manner appropriate for the fiber you’re using. I soaked each skein for 20 minutes in a cool water bath with some Eucalan, gently squeezed out some water by hand and with a towel, then hung them to dry with a wooden hanger to weight them a little. Once dry, be sure to knit with your skeins in the intended order along your fade. Wash again to let those stitches relax and even out. And here are my results!


Conclusions:
This was a lot of work and planning but so much fun! I enjoyed every step, especially preparing the fiber by separating the colours and dizzing it all from my hand cards. Seeing the fade and the subtle colours all arranged and ready to spin is one of the most rewarding parts of spinning for me. It’s like preparing for painting with your palette of colours. And Inese’s Ravie Poncho is a perfect canvas for a fade, with the raindrops gathering in unexpected rivulets in the smock stitch along the bottom edge.
Something I might have done differently. I might have used less colour. Even during the fiber prep and at the wheel, I pulled a little colour out but I could have removed more. The subtlety of the raindrop is lost in the darker yarns and they look more variegated. I also might have tried to have the same colour wrap around and meet at the seam. The effect is still lovely but not exactly what I had envisioned. Making a true raindrop yarn is hard! Less colour is more raindrop. I strongly recommend you seek out Kim’s instruction if you’re at all inspired by this project. I’m a fairly new spinner and Kim is a master. She goes into so much more detail and nuance.
This knit is so cozy. It’s definitely a warm hug. Worn on the bias the Ravie is a comfortable, flattering fit. And the polwarth fabric is squishy and retains its shape well. There is something very special about making your own colourway, spinning it, and knitting a wearable piece of art. If you try a raindrop or a raindrop fade, please share. I’d love to see your project and share it back with Kim. Happy making!